Digital products typically refer to booking, services, downloadable products (PDF files/Ebook), etc.
Examples of this would be phone applications, software upgrades, and other digital products.
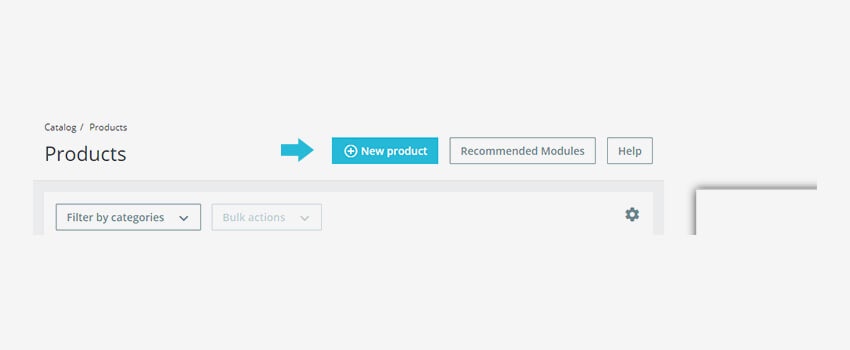
- In your Prestashop admin panel go to Catalog ➜ Products section :

2. Click the New Product button at the top right of the page :
3. Next to the product name, you need to select a Virtual Product type from the dropdown list. The page organization will be changed.
4. Now you have to set up the Basic settings for the new product :
- Reference – Add the internal reference code for this product.
- Quantity – You can set the available quantity of the product for sales.
- Price – You can set the retail price you plan to see this product to your customers.
- Categories – You can choose the category your product will be assigned to.
- Image – You can add images to the product.
- Summary – Write a short description of the product.
- Description – You can add a detailed description of the product.
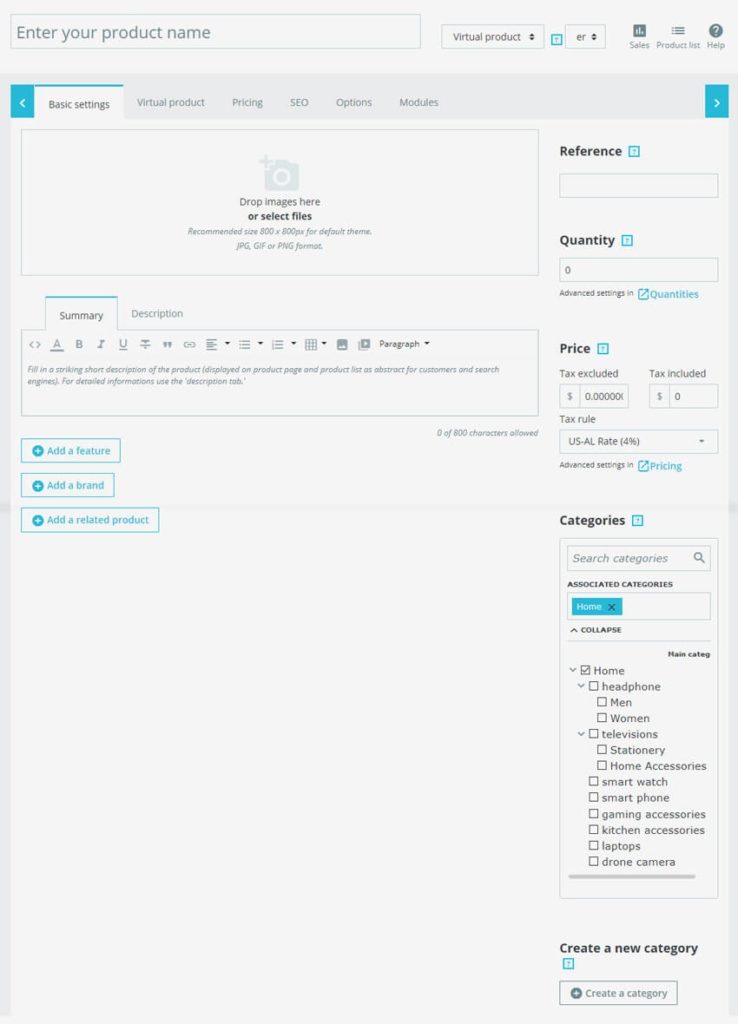
You can also add a feature, add a brand, and add a related product to your new product.
5. The second tab is the Virtual Product, where you can set the following options mentioned below :
- Quantities – you can set the quantity of the product.
- Then you will see Does this product have an additional file? So if you want to add Ebook or any other digital product. If you click Yes, Prestashop will open a new tab with form, where you can upload the file you plan to sell.
- File – You need to click the Browse button to upload the file from your computer.
- Filename – The name of the file, this field will be automatically filled after you upload the file. It is not recommended to change the name to another.
- A Number Of Allowed Downloads – You can set the number of times the file can be downloaded once the customer has bought it. You might choose to limit this to 1 or 5.
- Expiration Date – Your virtual files can be promotional or lose a selling value after a certain date. If so, you can set the expiry date after which the product will not be available in your store anymore. You can keep it blank if your product does not have an expiry date.
- A Number Of Days – You can set the number of days, after that the download link will become non-functioning
- Available Preferences – You can set the role of the product when it is out of stock.

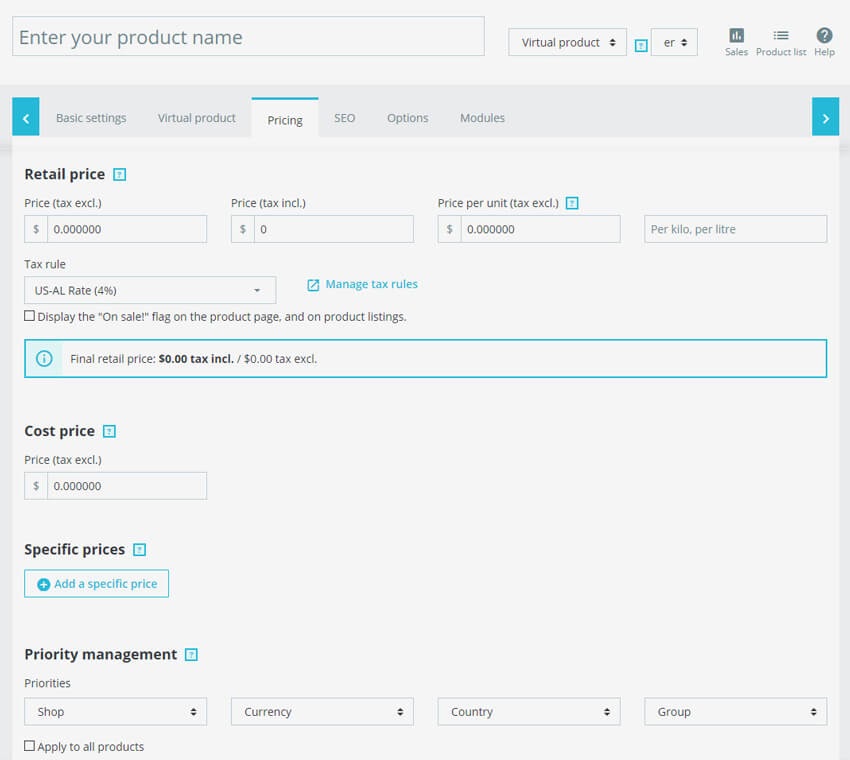
6. In the Price tab you can set the options of the product as mention below :
- Retail Price – You can set the price you plan to sell your product.
- Cost Price – You can set the price you paid for the product.
- Specific Price – you can set the individual price for your product according to the countries, groups, etc.
- Priority Management – You can select which rule applies first.
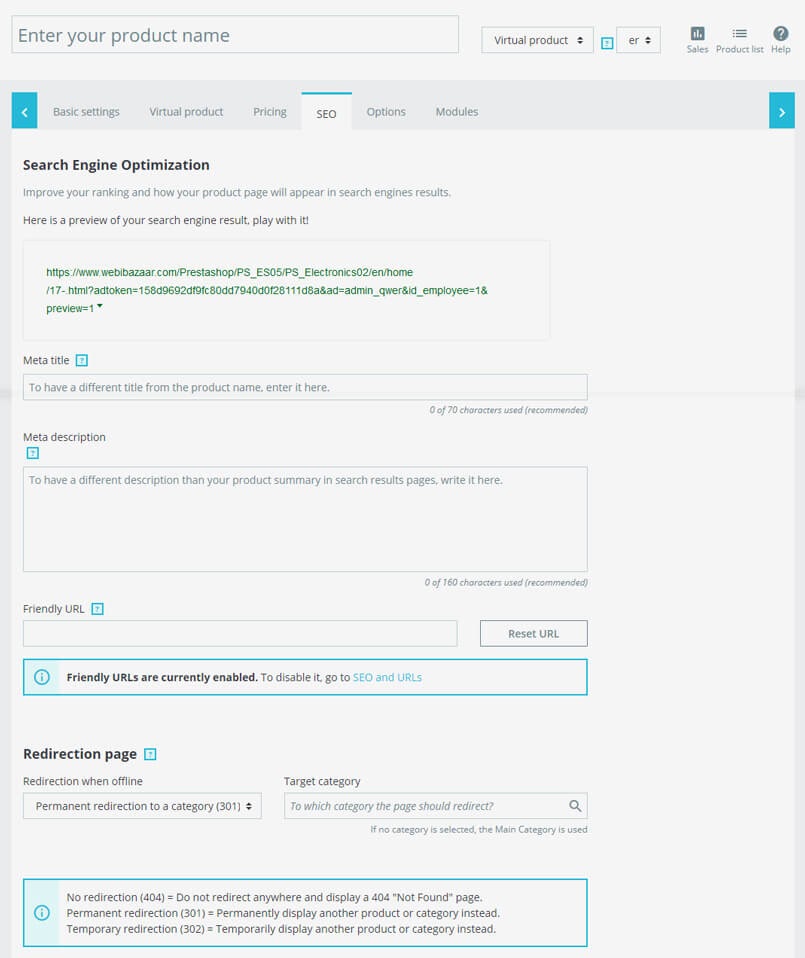
7. In the SEO tab, you can set settings as mentioned below :
- SEO (Search Engine Optimization) :
- Meta Title – You can add titles that will appear to visitors for the product’s page.
- Meta Description – You can add the description of the product that will appear in search engines.
- Friendly URL – You can create a URL for a specific product’s name.
- Redirection Page – When the product is disabled, you can choose which page you would like to redirect the customers visiting its page. It is also achievable to choose: No redirection (404); Permanent redirection (301); Temporary redirection (302).
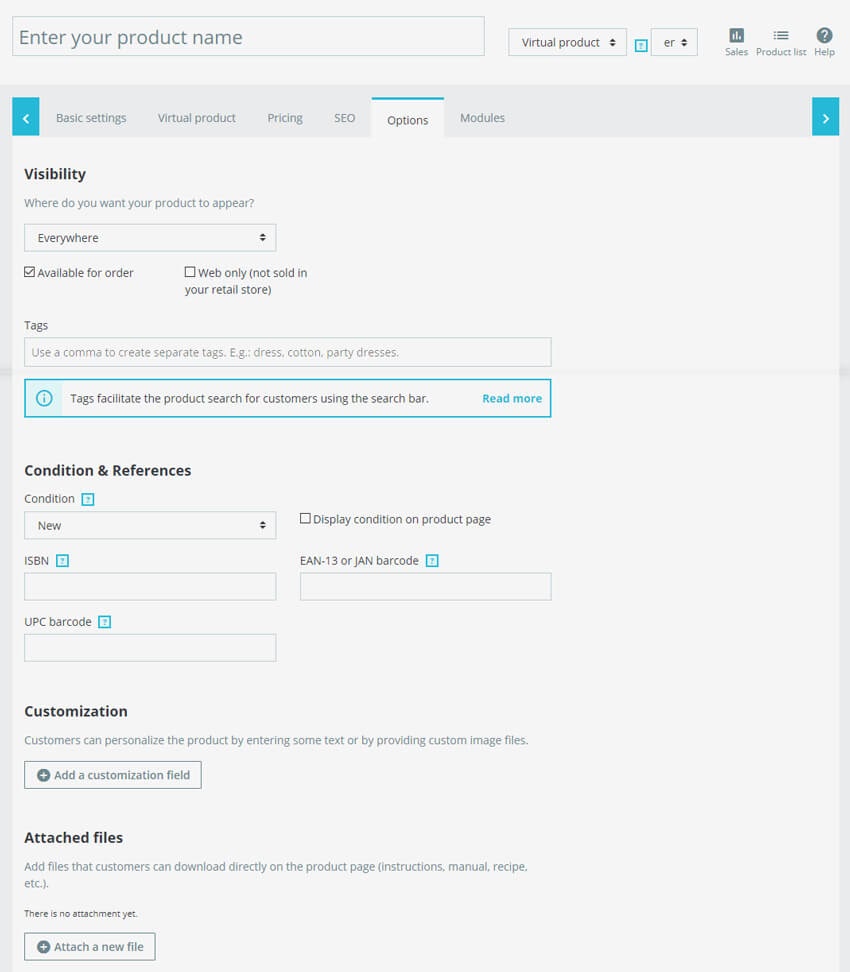
8. In the options tab you can set the options mentioned below :
- Visibility – You can choose where to display your product (catalog only, search only, everywhere, nowhere).
- Conditions & References – This option enables you to indicate the condition of the products as mentioned below :
- Condition – You can set the condition of the product, which can be New, Used, or Restored.
- ISBN – You can identify the books and their various editions internationally.
- EAN-13 or JAN Barcode – You can add this code specifically for Europe and Japan, it is widely used internationally.
- UPC Barcode – This code is widely used in the United States, The United Kingdom, New Zealand, Canada, Australia, and other countries.
- Customization – You get the ability to add additional text and Custom image file of the product.
- Attached Files – You can upload the additional files that customers can download directly from the product page.
- Suppliers – You can specify the suppliers of the current product and its combinations.
9. After you fill every detail click the “Save” button and refresh the page to check the product.
Hope this tutorial will be helpful to you!
Related Tutorials For PrestaShop :
How To Manage Features And Attributes | PrestaShop 1.7
How To Create A Category And Set It To Top Menu | PrestaShop 1.
How To Create A Products Pack | PrestaShop 1.7
How To Create Product Combinations Manually | PrestaShop 1.7
How To Create A Simple Product In Your Store | PrestaShop 1.7.X
How To Attach Files To The Products In Your Store | PrestaShop 1.7.X