Establishment
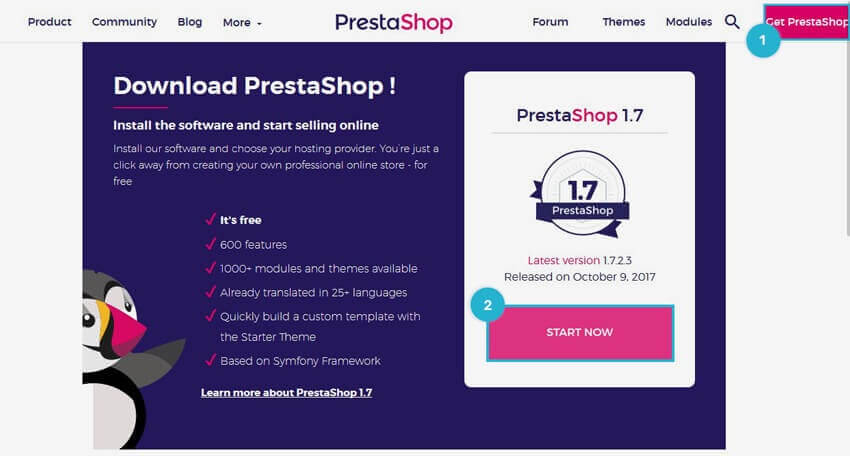
- Download a Prestashop engine from the official website: www.prestashop.com. Click on the “Get Prestashop” button seen at the top-right side. You will be redirected to the download option.
Next, Choose your profile (Merchant, Freelance, Agency, or Technology Partner.) and enter your email address. Then click on the download button.
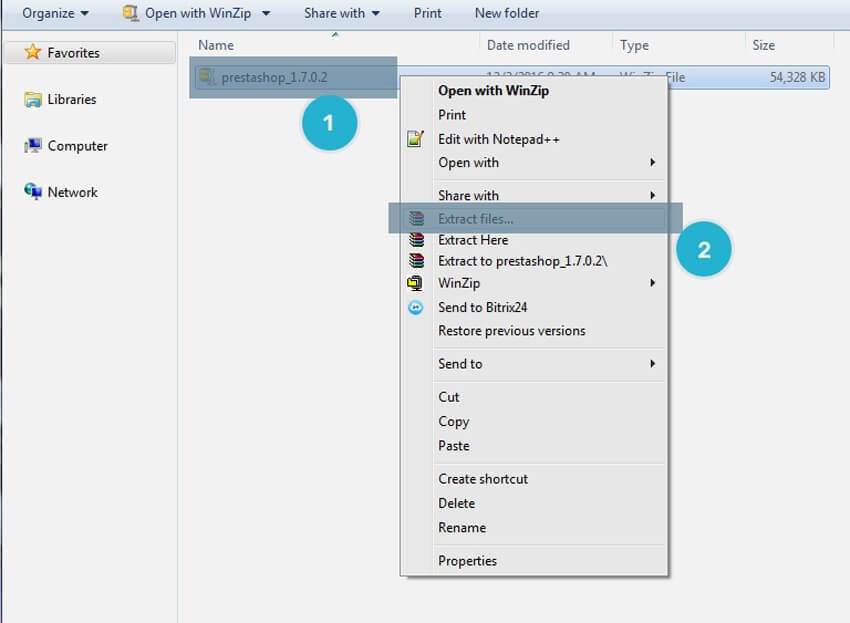
2. Extract the engine files into a folder on your computer you downloaded :
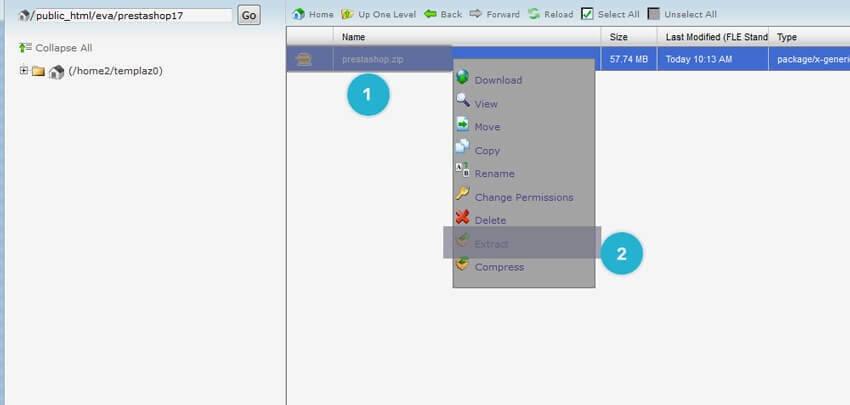
3. Open the engine folder of Prestashop, which includes the Prestashop.zip file. Upload this file to your server. Once it is uploaded, extract the file :
4. Create a database ( you can follow the detailed tutorial on How to create a database). Save the database name, username, and password. You will need it while installing the Prestashop engine.
Installing the Engine
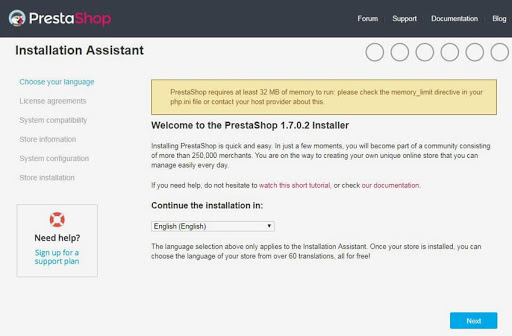
- Welcome page – This page will be a quick introduction to the installation process. Choose your preferred language for the installer, and click the Next button :
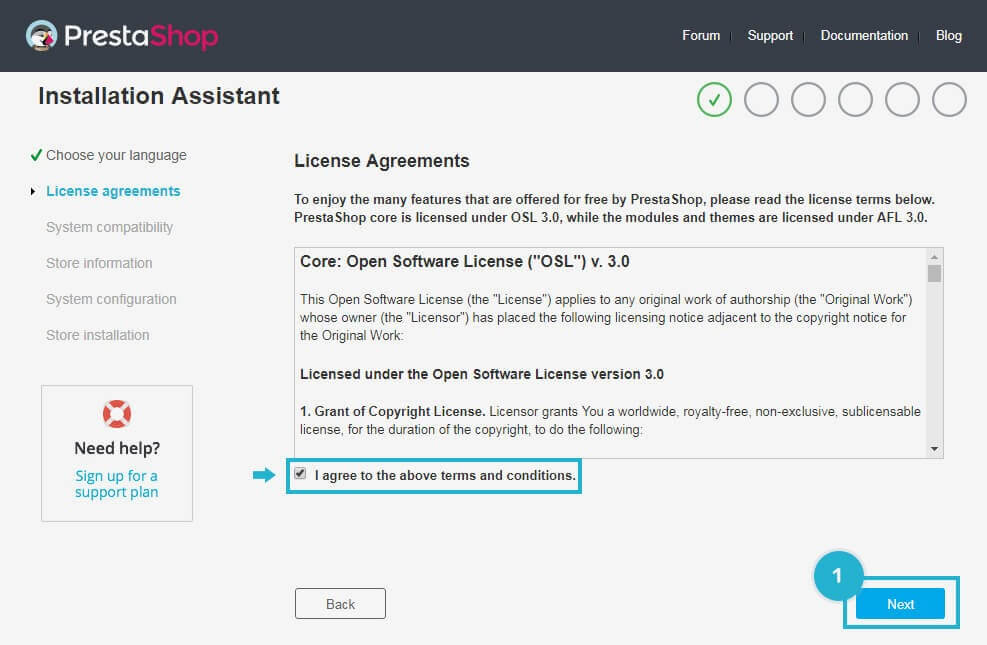
2. Prestashop’s Licenses – Prestashop is free and distributed under a set of open-source licenses. You cannot use Prestashop software if you disagree with the terms of licenses. To access the next step, you will have to confirm the “I Agree to the above terms and conditions” box. Click the Next button :
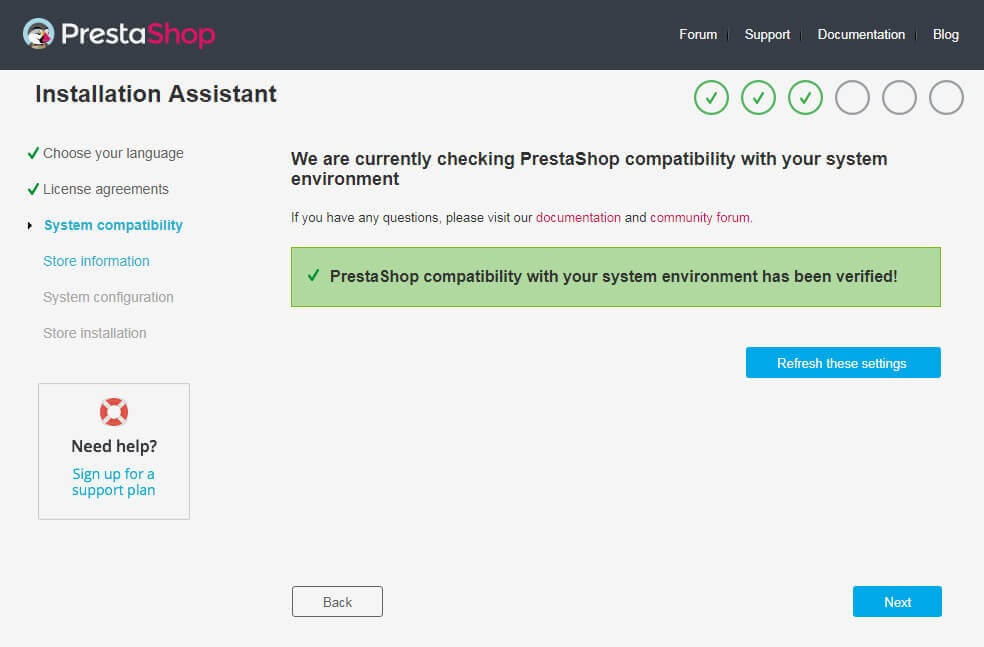
3. System Compatibility – It is a quick check of all the server parameters on your hosting. If nothing wrong will be found, you will be taken directly to the next page :
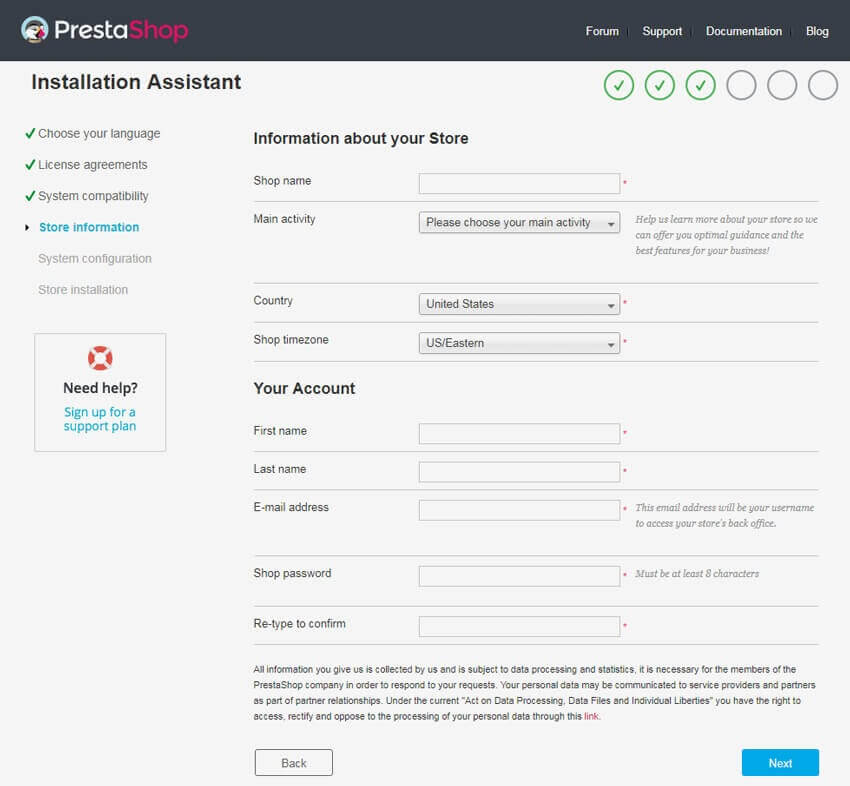
4. Store information – Here, you can customize your store easily: specify its name, specify the main activity and personal information :
5. System configuration – Fill the fields with the database connection information: Database server address, Database name, Database login, Database password, Table prefix :
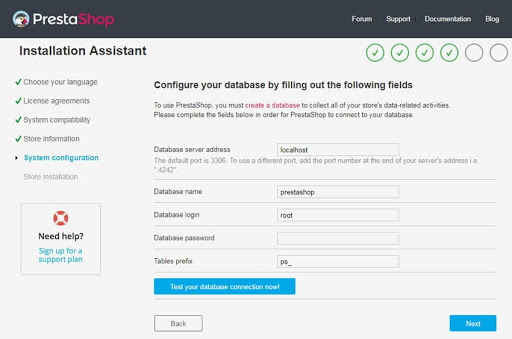
NOTE: if you don’t have the database access details or you have some difficulties creating a database, you need to contact your hosting provider.
NOTE: DO NOT change the default ps_prefix if you want to use the template’s (dump.sql file) sample data.
- Click the “Test your database connection now!” button to check that you used the server information correctly.
- Click the “Next” button. The installation process will start configuring your store, creating and populating the database tables, etc.
6. Once the installation is completed, rename or delete the “install” folder in your Prestashop installation directory in order to improve your Prestashop store security.
Hope this tutorial will be helpful to you!
Related Tutorials For PrestaShop :