In this article, we discuss How to Add a Menu in Shopify by Shopify website designers.!!
In Shopify, It’s very easy to add a menu to your website. Shopify website builder can add a menu to your online free Shopify website Templates store to build your store’s navigation.
Webibazaar Templates provide many eCommerce Webdesign Template platforms on Best Prestashop themes, Responsive BigCommerce themes, Shopify themes, OpenCart themes, WooCommerce themes.
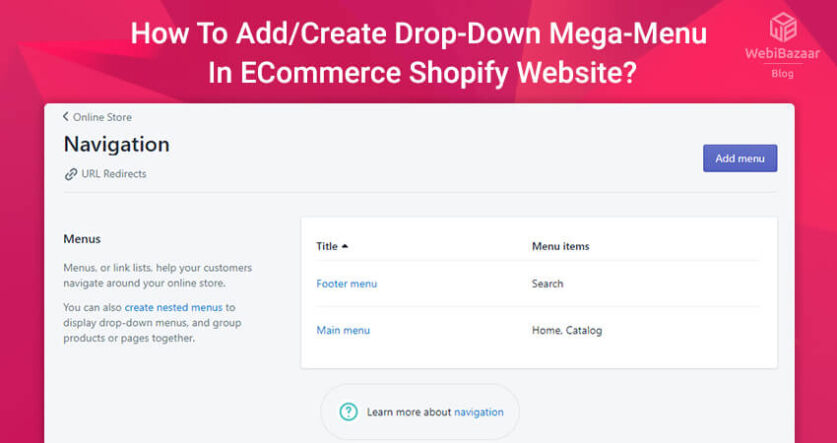
You can link the menu to Collections, Products, Pages, Blogs, Blog Posts, Policies, etc. You can also create Nested Menu to display drop-down menus and group products or pages together.
Follow the below step to add a menu to your store.
STEP 1: Create a menu in Your store
Login Shopify Admin panel, Go to Online Store > Navigation > Add menu.

Related Read: Best Shopify Theme For Mobile Phone
STEP 2: Add Menu items in Your store
Now Give a title for menu and click on Add Menu Item to create menu. You can also edit or remove menu from navigation.
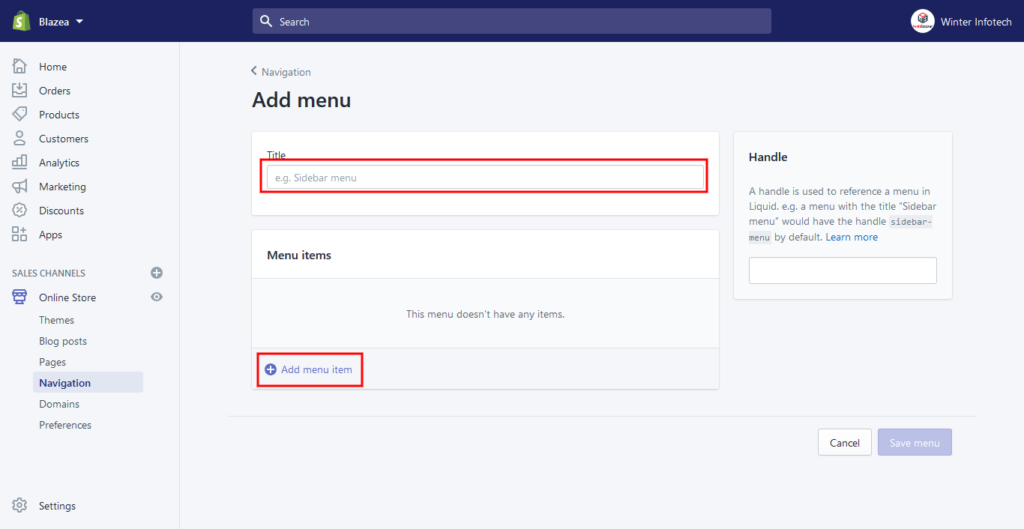
After add menu, click on Save menu button.
You can also create Nested menu to display dropdown menu. Also, You can Drag and drop menu item from one position to other position.
After all this modification, Click on Save Menu button.
Hope, this article will helpfull for you!!
If you want to see more Shopify theme, then just click on Shopify website design
Check more blog :
How to change Admin panel language in PrestaShop 1.7.x
How to Enable User Registration in Shopify