Countdown Timer of PrestaShop Theme by Webibazaar Templates helps you to Quickly and Easily add a timer to the products which you want. It will help you to increase sales in your store.
The Countdown Timer shows your visitors which offer is active and in which limited time, it will expire. Because you set a timer for the discount of selected products so, it will help you to increase sales.
Installation
- 1. First, you need to download the module(wbproductcountdown), click here to download the module.
- 2. Go to Back-office Module manager > Upload a Module
- 3. After Complete installation, the Configure button will show.
Configuration
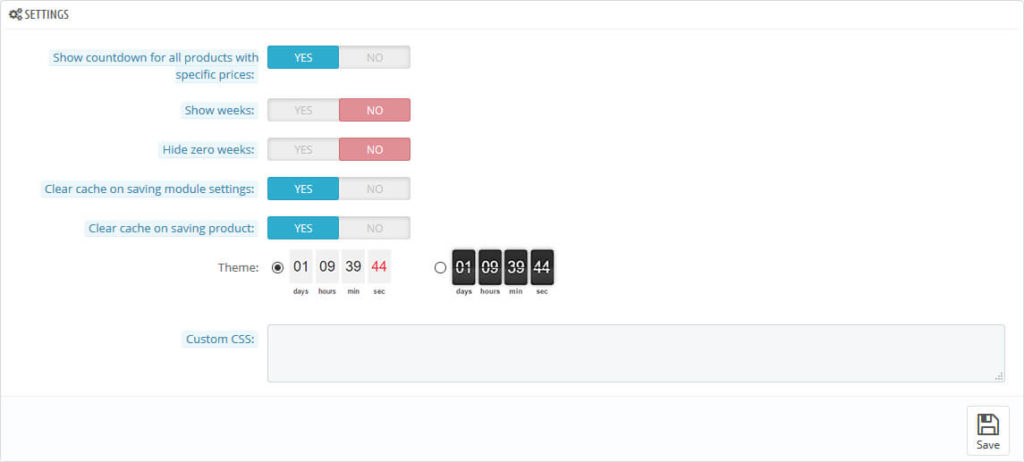
Click on the Configure button, you will see the settings of the Countdown Timer.

Related Read: Best Organic Food PrestaShop Themes in 2022
There is a list of field settings, you can use by Enable or disable button. You can also add your custom CSS to the text box as shown in the screenshot.
In the countdown Timer module, two types of design are available as shown below screenshot, click on the design that you want to show in your product

How to use
After installing the module Go To Catalog > Products > Edit Product
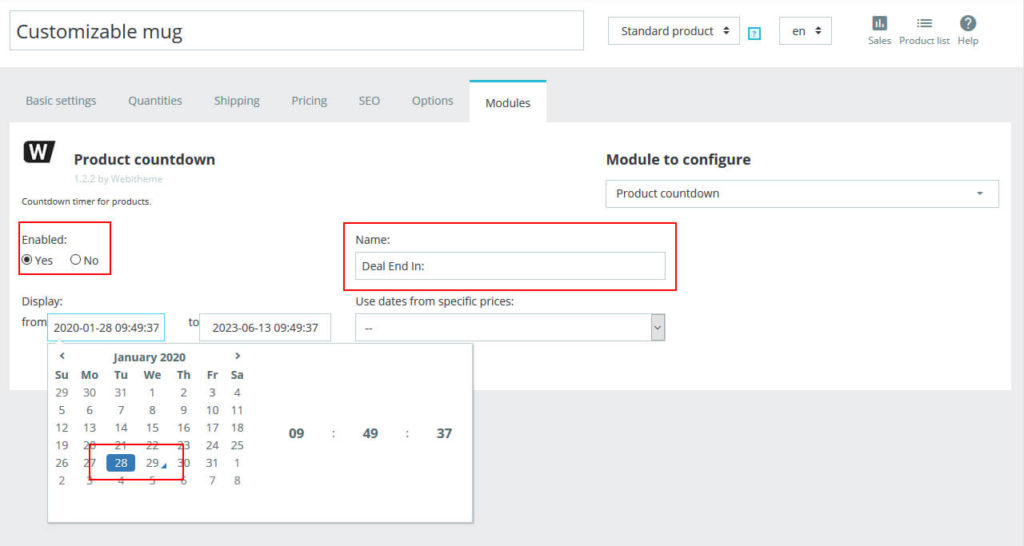
Go to Module Tab, Product Countdown module will display. Click on the Configure button

As shown in the screenshot Select the Enable button if you want to show a timer in this particular product.
Enter the text if you want to add timer related message
Last, Enter the Starting date and Ending date.
NOTE: When you add the starting date, make sure that add the date of Yesterday as you see in the above screenshot.
Click on the Save button.
Go to your store and refresh the page, you will see a Countdown timer add to your product.

I hope, you like this Article and also Countdown Timer Module.
Read More Blogs and Services
How to Setup Multistore in PrestaShop 1.7
How To Add Product Combination And Attributes In PrestaShop 1.7
Page Speed Optimization Service
