Let’s learn How to Enable Debug mode in PrestaShop 1.7.X.
Sometimes your website Behavior is Abnormal like Blank Screen, Error 500 Etc. In this case, you need to Turn on Debug mode.
You have issues with your shop and don’t know where to start then Just Enable debug mode to display output information such as warnings, errors, etc…
Why did you need to Enable Debug mode in PrestaShop?
1. Abnormal Behavior of your site at the Front side and Admin side.
2. Blank Screen on your Website.
3. Having 500 errors.
Now let’s start to learn about How to Enable Debug mode in PrestaShop 1.7.X(Display Error)
Related Read: How To Change Admin Panel Language in PrestaShop 1.7.x?
Enable Debug mode
1. Enable Debug Mode Automatically(At Admin Side)
To enable debug mode(Error Reporting) follow the below Steps.
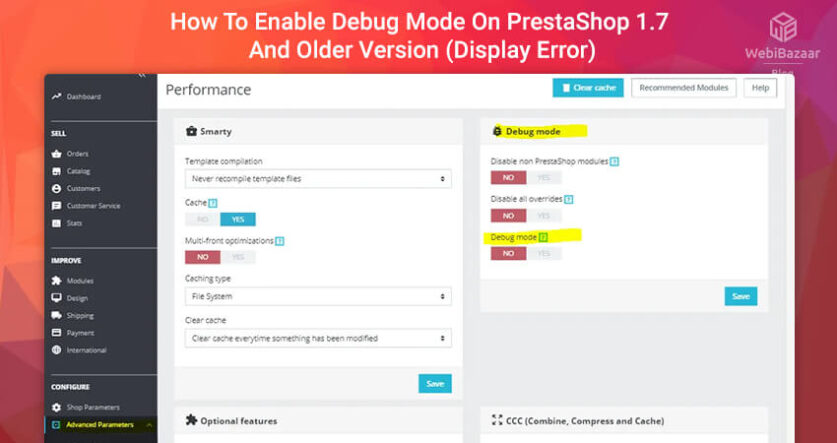
1: First of all login into your site admin panel
2: Go to Advanced Parameters -> Performance
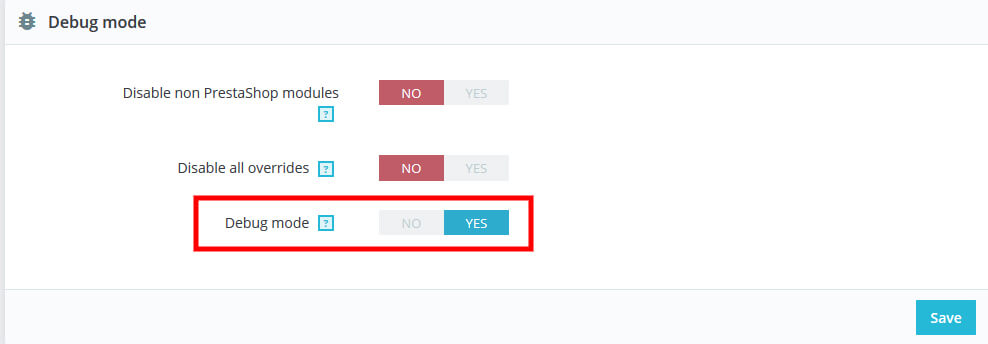
3: In the ‘debug mode‘ title set option to yes.
4: Now click on Save Button.
2. Enable Debug Mode Manually(Using FTP)
1: Connect to your server using FTP or any hosting like Cpanel or FileZilla etc.
2: Open your PrestaShop Root Directory and Go to Config/defines.inc.php and open this file.
3: Now Find the following code
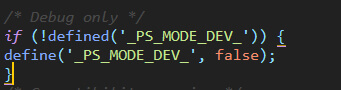
4: Edit with following code
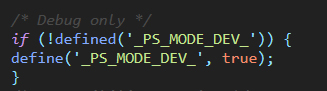
5: Now save Change and Refresh the site and See Error.
Hopefully, Enable Debug mode in PrestaShop 1.7.x. is helpful for you.
Check the Best PrestaShop Themes Provide by Webibazaar.
Check out the Best PrestaShop Modules Provide by Webibazaar.
Related Posts and Services
Best Premium PrestaShop Themes In 2023
How to Change Size of Product Image in PrestaShop 1.7
PSD To OpenCart Conversion Services
Webibazaar Technical Support Service
Webibazaar Templates provides many eCommerce Web Design Templates platforms on PrestaShop Themes, BigCommerce Themes, Best Shopify Themes, Top OpenCart Templates, Responsive WooCommerce Themes.