To manage your store’s main menu follow the steps mentioned below :
The main menu of your store can be managed through theme customization. You can open your Shopify admin panel and go to the Online store ➜ Customize ➜ Header ➜ Megamenu section.
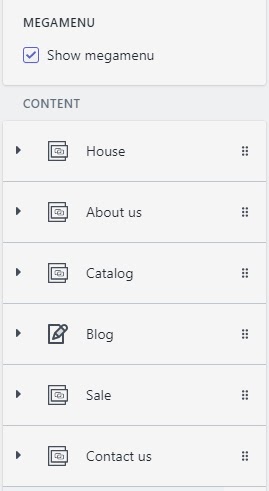
The theme editor allows you to enable/disable the main menu. There is a list of menu items. It is possible to add 6 items at most.
By adding a menu item you get 5 options, let’s know more about them specifically :
- Simple link – it has a title and a link property, which you can change.
- Link + link list – it has a title, link, and the properties of the links. It’s possible to leave the link blank in case you want the user to be able to choose from the drop-down options.
Linklist allows you to choose your items set which can be managed from the Online store ➜ Navigation. These items are available as a simple drop-down menu item.
- Link + 4 Link lists – it allows you to create drop-downs with the collections. It has an option for 4 rows with your link lists, it can also be managed from the Online store ➜ Navigation.
- Link + simple products – it gives chance to output the products from a certain collection. 4 products from the collection you choose will be shown.
- Link + blog listing – it shows blog posts from the blog you choose. You can manage blog items by going to the Online store ➜ Blog posts section.
There is also a chance to drag-&-drop items to move them in the menu list.
Hope this tutorial will be helpful to you!
Related Tutorials For Shopify :
How To Create A Drop-Down Menu | Shopify Themes
How To Edit Footer Links And Copyright Notification | Shopify Themes